1. Login to your IDX control panel using your personal login information.
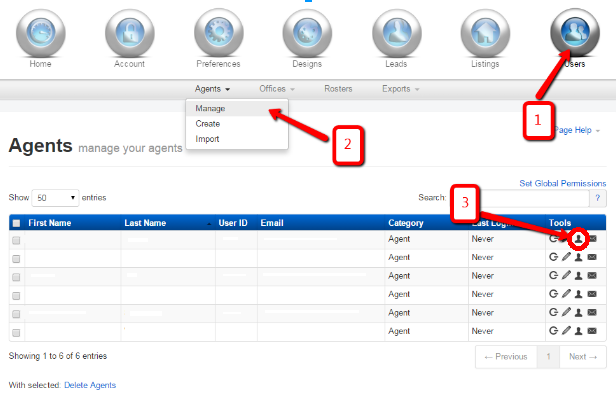
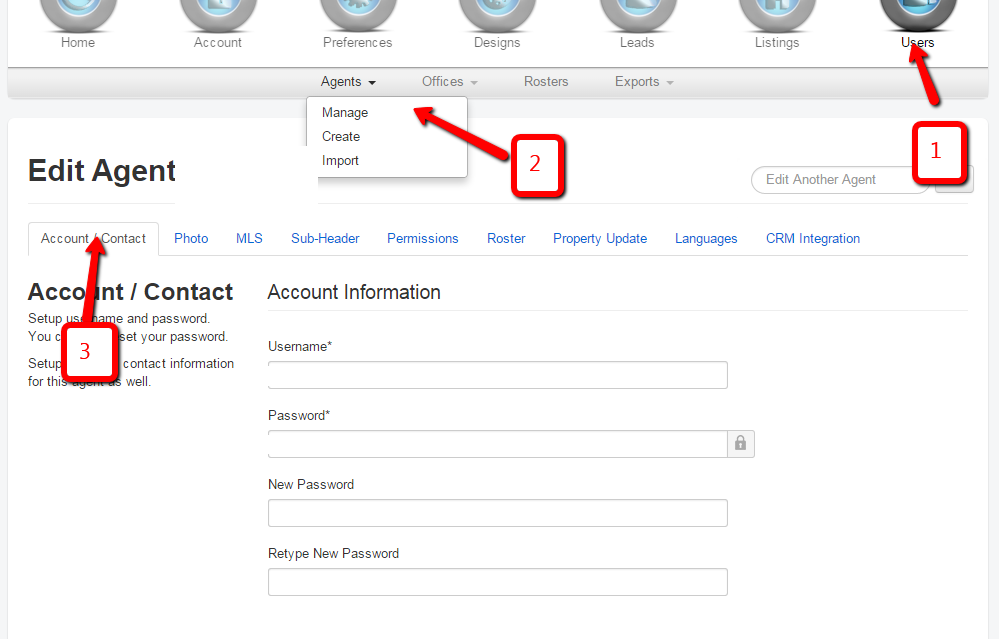
2. Select Users on the dashboard. Click the drop-down arrow button beside Agents, then select Manage. To access the controls for a particular agent, select the head icon across the name of the agent, under Tools.
3. On the agent’s settings, click Roster.
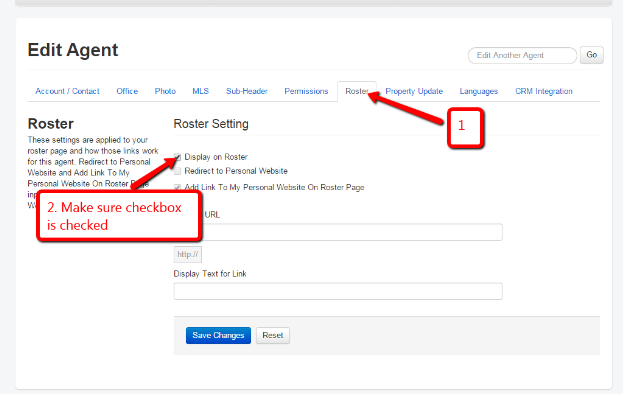 NOTE: Make sure that the checkbox beside “Display on Roster” under Roster Setting is ticked to ensure that the agent’s name will appear.
4. To edit Agents Details
NOTE: It is advisable to to put each agent personal email so that all inquiries will be properly received
5. Click on the Sub-Header tab.
Disclaimer: The following CODE INSERTION is for Expert users. The purpose of this code is to prioritize the agents header, so that other header would not display if the agents header is enabled . If you would like HoopJumper to do this process for you, please email us at support@hoopjumper.com with the specifics of the Agent you wish this set up for and we will implement this for you.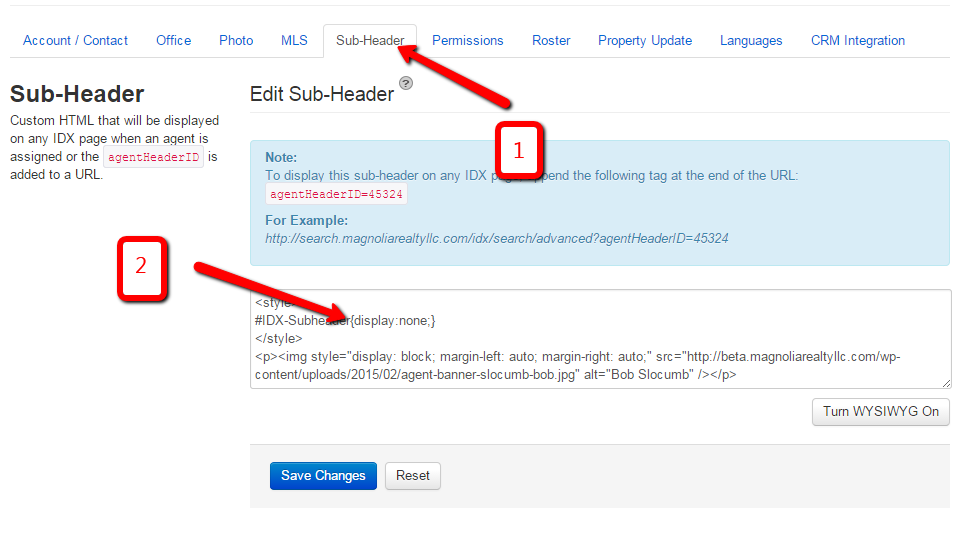
NOTE: Please make sure that the following css code is there before the custom header:
<style>
#IDX-Subheader{display:none;}
</style>
6. Click on the CRM Integration tab. NOTE: This is optional step if the agent wants to integrate the leads to TOP PRODUCER CRM.
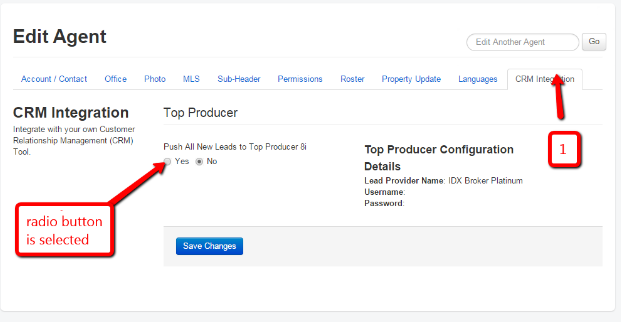
NOTE: Please make sure that the radio button under “Push All New Leads to Top Producer 8i” is selected to “Yes.”
Comments
0 comments
Please sign in to leave a comment.